I didn’t get into the shed during the week so I was itching to get in last night. Managed to get a good session in.
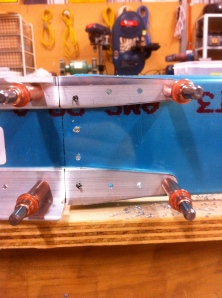
Using my #30 drill bit, I match drilled all the skins holes I hadn’t gotten to during my rilling of the forward spar and inner ribs. It soon became apparent that I needed a way to keep track of which holes I had drilled and what I hadn’t drilled yet. I used a mark on the blue plastic with a Sharpie pen which worked effectively. I was careful in match drilling so that the holes were in alignment before I drilled them out. The usual method of a cleco in every 2nd hole worked well, except for the main nose rib. For this area I had a cleco in every hole and I removed 1 cleco at a time to drill. Once drilled I marked that position and put the cleco back. The skin and rib weren’t exactly flush but this method seemed to work ok.

It took a while to get the upper and lower skins done on the left and right stabilisers but it wasn’t too bad with the radio cranked. I then took the skins off and match drilled the angle reinforcements to the forward spars. I drilled the out holes first and put a cleco in before I did the remainder so that nothing moved around whilst drilling. Worked out ok.

I removed the nose ribs to give me better access to drill the angles and noticed the aft notch catching on the angles on one edge. Looks like I need to sand off a touch to provide some clearance. I’ll do that when I’m deburring all the parts.
I hadn’t dimpled the forward spar channels or countersunk the angles yet, as I wasn’t sure an the setup required at the time. I’ve since got the advice from my SAAA Technical councillor (Thanks Bo!) and went ahead and dimpled the spar channels. I checked the plans about 5 times before I dimpled as heaps of builders have dimpled the wrong side here. The dimples need to be sunk forward into the angles, which is why the angles need to be countersunk.

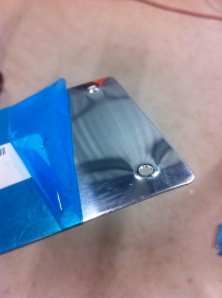
I then set up my microstop countersinking tool. It took a minute or two to figure out how this tool worked, but once I figured that out I tested it on some scrap wood. I checked the countersink diameter with a vernier and erred on the side of “not enough”. I then countersunk one of the angles and checked for depth using a piece of scrap alclad that I had dimpled during my riveting practice. I hadn’t countersunk enough for a flush fit so I kept making a minor adjustment to increase, check and increase, check and increase…until I got it right. Then I countersunk the remaining holes.

Then it was time to take everything to pieces. Feel a bit like going 2 steps forward, 1 step back … but I know the importance of deburring and edge finishing. Must be done so here are all the HS parts laid out and ready for deburring.

Build time 2.5 hrs.
You building your own rc plane, mate? Looks like a mighty undertaking!
Posted by Michael strack | May 7, 2011, 5:12 pmNot quite r/c. The real deal. 🙂
Posted by gstrack | May 8, 2011, 1:05 pm